I have developed a rather weird fixation with buckets and all the things they can be used for. I hate the waste of seeing them thrown away. I used to work at a Truck stop with a restaurant and they got their pickles, margarine and mayonnaise in good heavy food grade plastic buckets. While I was there I used to get the cooks to throw the used buckets in the back of my pickup. Then I got busy!

I grew things in these rejected buckets. Herbs, Lettuce, Flowers and even an experiment with potatoes. They were wonderful and convenient I could move them around when I mowed the lawn and they looked pretty filled with flowers and hanging up!
It is a simple procedure to use buckets for this, first check with any local restaurant to see if they have any they can give you.
Wash them clean of any food residue or there can be insect problems when ants or bees go after honey or other things they have had in them.
Drill 4 holes in the bottom of each pail about equal distances apart and 1 to 2 inches above the bottom of the bucket.

Drilling a Hole

The Hole placement, about 1 inch from the bottom of the bucket.
Add a layer of gravel to help with drainage about 1 inch deep on the very bottom. Then fill with good composted soil or potting soil or even regular dirt. Plant your flowers, herbs or pepper plants!

Jimmy Nardello peppers, this plant yielded 17 peppers over its life..in a Bucket!
If you love Irish potatoes and baby potatoes and your limited for space they do quite well in buckets too!
This is a bit different and after some experimentation I have found this works well.
Step 1: Drill the holes in the bucket. Omit the rocks and place the holes 1 inch above the bottom of the bucket.
Step 2: Put topsoil into the bucket to about 1/3 full.

Step 3: Plant the seed potato.

You can see the seed potato at the end of the Trowel.
This is an Adirondack Blue Potato, Blue flesh and very tasty. They are a smaller potato and it makes wonderful roast potatoes or pale lilac mashed potatoes.
Step 4: Cover the seed potato with about 2 inches of either potting soil or regular dirt. This leaves about half the pail empty and as the potato plant emerges you cover it again...similar to hilling it in a regular garden.

Adding a cover of potting soil.
Step 5: Let the plant grow and hill it as needed until it is well grown above the edge of the bucket.
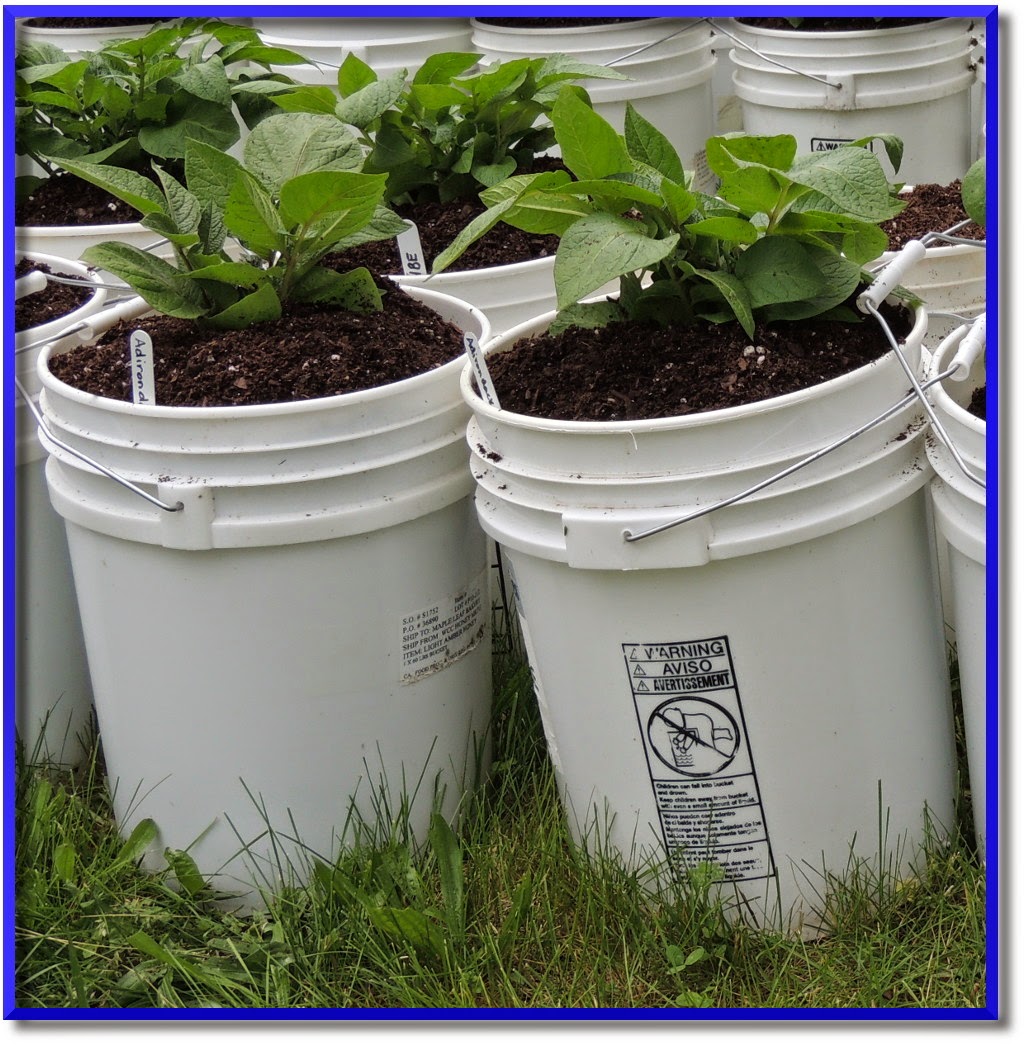
These plants were just topped up with potting soil and are ready to get making "tater's"!
Step 6: The hardest part of this process is keeping them watered evenly. I catch rainwater and use a large plastic cup, about 16 ounces, and water them about every second day or as needed. Water, watch for and pick potato bugs and let them grow. I use no chemicals on my potatoes.

Here are some well grown Adirondack Blue from last year.
Step 7: Harvest as needed. To do this I dump the pail slowly into a tub and there is no digging, I just sift through the soil and get lovely potatoes for fresh eating. The the dirt mix goes back into any area of my regular garden that needs bit more organic mix. Or you can stock pile it for next year.
You can use these bucket potatoes for lovely new or baby potatoes or you can let them grow and develop for fall storage and eating. The last storage potatoes from the bucket "brigade" made fine roasted potatoes here in the first week of April!

Here is an idea of what you can enjoy by the bucketful!
These were harvested from buckets along the sidewalk into the house.
Red Pontiac, Kennebec, All Blue, Adirondack Red, Adirondack Blue and Caribe'. All grown in buckets saved from the landfill!

You can see the colored flesh of the new potatoes. It makes for an added burst of fun when you dig them!
I am looking forward to baby potatoes from this years buckets and I can almost taste them, cooked lightly with a sprig or two of mint in the water then served hot with butter and of course Kosher salt....yummm!
So if your limited for space and wnt to try something different think of buckets and have fun!
There is much more to buckets than just pailing grain to livestock!
omg.....I loved this post! Does it really work that easily? I would like to try it......you're something
ReplyDeleteHi Fiona! What a wonderful idea! I love that you saved the buckets from the landfill! I tried that one year with tomatoes and they did o.k. but not very high yields. We've tried so many different ways to garden and I'm hoping what we're doing now will work! You have given a great demonstration on how to plant the potatoes! Thanks for sharing! Have a nice holiday! Blessings from Bama!
ReplyDeletePerfect timing! I am faced with extra seed potatoes that cannot fit into my garden. AND I have some buckets! I think I might also do a few tomatoes in buckets, too. The absolutely great thing about them is that I can put them on the deck - where I can't ignore them and under-water them. Thanks for the tutorial!
ReplyDelete